A Little Pasta My Heart: Making Pasta By Hand
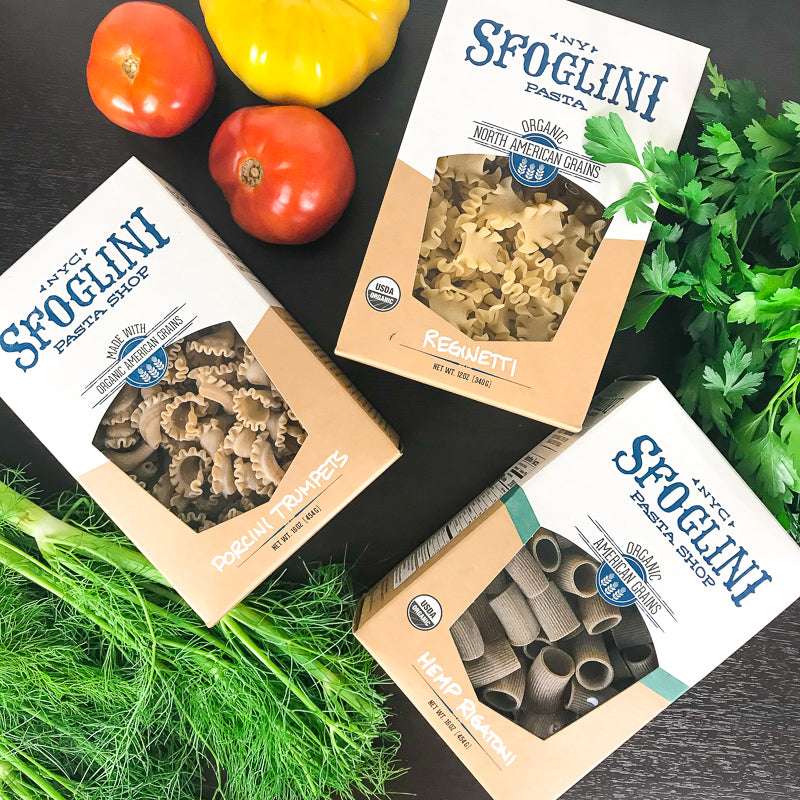
The pasta stocked on our shelves is carefully selected for the highest quality we can find, from locally-made pasta with New York State heirloom grains to tried-and-true Italian pasta makers with centuries of history. Sometimes, though, the best approach is a hands-on one! Our head cheesemonger & buyer, Emilia D’Albero, who is also our resident VIP—Very Italian Person—has just the right recipe to get you making pasta like a pro in no time. Emilia says:
“Pasta making is a classic Italian lavoro a mano or “handmade” product. Italian cooking is all about simplicity and quality of ingredients, so you’ll want to use the highest quality you can find!
Regular AP flour (preferably local) works for this egg dough recipe, which is typically used to make long, flat pasta or filled pasta like ravioli. Local pastured eggs with deep orange yolks, or “il rosso dell’uovo” in Italian, will give your pasta both the best color and flavor.
This recipe uses a pasta machine (sorry, Evan Funke! I love you, please don’t hate me!), which is a great way to get dinner on the table faster if you don’t have the time to make your pasta by hand, or “allo sfoglio,” with a rolling pin.
Make sure to pair your fresh pasta with the right kind of sauce! Larger, heavier pasta goes well with heavier sauces (think pappardelle with wild boar ragu or tagliatelle with bolognese) and smaller, more delicate pasta works better with lighter sauces like pesto, al limone, or aglio, oglio, e peperoncino.
The steps below are less rules and more guidelines; this is just my favorite way of making pasta. Everyone makes their pasta differently, and as long as you have fun and it tastes good, there’s no wrong way!”
Let’s Get Cooking!
Basic Egg Pasta Dough
Serves 4-6, depending on how hungry you are!
400 grams AP flour
4 large eggs
Pinch of salt, to taste
Tools Needed
Sheet tray
Kitchen Scale
Fork
Plastic wrap (or eco-friendly alternative)
Pasta machine
Rolling pin
Knife
Piping bag or sandwich bag
Ravioli/cookie cutters
Other pasta tools, as needed
Step 1: Make the Dough
On a baking tray or large tray with raised sides (to contain the mess!), dump your flour into the middle of the tray and make a well in the middle. (If you live in Brooklyn, it’s likely that your only counter space is the size of a baking tray.) Crack your eggs into the well and mix them with a fork until combined. Slowly incorporate flour from the sides of the well into the egg mixture, being careful not to let the runny eggs escape the well. Once most of the flour has been incorporated, continue to combine with your hands or a bench scraper until you have a shaggy dough! Now you’re ready to knead.
Step 2: Knead the Dough
Fold the dough over in half and with the flat part of your palm, push away from your body into the dough. Adjust it one quarter turn, then fold it over again and push with the flat part of your palm. Repeat this kneading process until the dough becomes smooth and yellow in color. This part is really labor intensive and will be tough if you’ve never done it before. Keep going and don’t give up - I promise it will be worth it.
If your dough is too dry, add a spritz of water and continue kneading. If your dough is too wet, add a sprinkle of flour until you get the consistency you’re looking for. Knead for about 10-15 minutes. You know it’s ready when you can push your finger into the dough and it springs right back at you.
Form your dough into a ball and wrap tightly with plastic wrap (or an environmentally-friendly plastic wrap alternative—you just don’t want your dough to dry out). Let the dough rest at room temperature for 30 minutes or overnight in the fridge. DO NOT skip the resting step or you’re gonna have a bad time. After 30 minutes or so, poke your dough again to check if it’s ready to form. If your fingerprint stays and doesn’t bounce back, you’re ready to roll!
Step 3: Prepping Your Rested Dough
Cut your dough ball in half and wrap one half back up tightly. Lightly flour the other half of the dough and roll it out with a rolling pin until it’s just thick enough to fit through the largest setting on your pasta machine. If you don’t have a rolling pin, a wine bottle totally works too.
Step 4: Rolling Out Your Dough
Starting with the largest setting on your pasta machine, pass the dough through the machine twice on each setting. Sprinkle a little bit of flour on the sheet every so often so that your dough doesn’t stick to itself or the machine and rip. Crank the machine with one hand and catch the dough with the other. I like to stop at the second-to-last setting on the machine, or until you can see your hands through the pasta sheet. If the sheet becomes too long, you can cut it in half and continue to roll out each sheet separately.
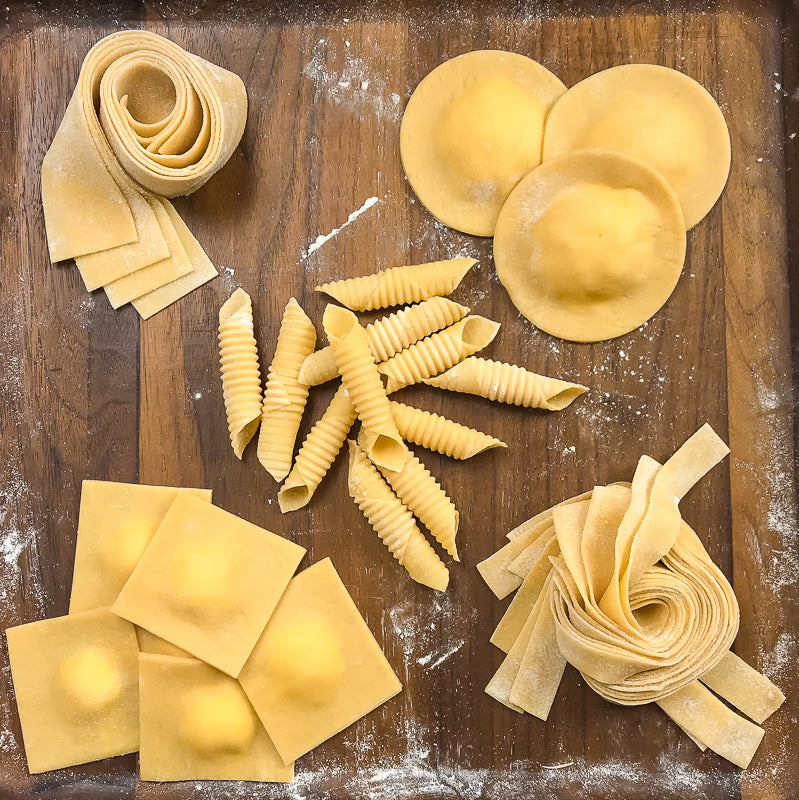
Step 5: Shaping Your Pasta
Lay your sheets out on a lightly floured surface and trim the ends so they’re even. But don’t throw the end pieces away! These bits are actually a different type of pasta - they’re called maltagliati (meaning “badly cut”) and are excellent in soups. Fold your pasta sheet over as shown and again, trim the ends.
I’m going to show you how to make a few different types of fresh egg pasta. You certainly don’t have to make all of them for one meal, but if you do, I won’t judge. It’s really fun.
Step 6: Tagliatelle & Pappardelle
Tagliatelle: With a sharp knife, cut your folded pasta sheets into strips about ¼-½ inch thick. Unroll and form into little nests until you’re reading to cook your pasta.
Pappardelle: With a sharp knife, cut your folded pasta sheets into strips about 1 inch thick. Unroll and form into little nests until you’re reading to cook your pasta.
Step 7: Ravioli
Lay out a lightly floured pasta sheet and trim the ends. Using your desired size cookie or ravioli cutter, gently press into the dough (don’t cut all the way through!) to mark where your filling should go.
Make your filling (I’m using plain ricotta cheese here for demonstration purposes) and put it into a piping bag or sandwich bag with the corner cut off. Gently pipe your filling into the center of your marked circles on the pasta sheet, making sure not to get too close to the edge - remember, you still have to seal the ravioli!
Step 8: Sealing Your Ravioli
Dip your finger into a cup of water and gently wet the exposed edges of each raviolo around the filling. Place another sheet of pasta on top and press down around the filling of each raviolo to seal them and make sure there are no air bubbles in there.
Step 9: Cutting Your Ravioli
Use the same cookie/ravioli cutter to cut out your ravioli, and pull the excess pasta away. Look, you made ravioli! You can either cook these now or lightly flour them and put them on a baking sheet in the freezer. Once they’re frozen, you can take them off the sheet and put them in a plastic bag to save for dinner another night.
Step 10: More Ravioli
If you don’t have a round cookie cutter, you can also make square ravioli with just a knife! Take your sheet and gently fold it to crease it where you will be cutting the ravioli. Place your filling and seal the ravioli as you did in Step 7. Cut the ravioli with a knife to separate them.
Step 11: Garganelli
This is a really fun shape that looks very fancy but is actually not that difficult to make! However, you do need to have a gnocchi board and some kind of a dowel. These are pretty easy to find on the internet and are useful for many other things (you can also use it for gnocchi and cavatelli).
Lay out a sheet of pasta dough, like you made in Step 5, and cut into squares about 1.5-2 inches. Place one square on the gnocchi board diagonally, and drape the corner of the square closest to you over the dowel. Roll forward and gently push until the entire square has been wrapped around the dowel, and it should slide right off! Repeat until you’ve used up all your dough, but let these little guys rest for a while before cooking them.
Step 12: Brag
Arrange your pasta attractively and take a photo for social media to let all your friends know that you make fresh pasta now.
Cooking Your Pasta
Salt your pasta water until it tastes as salty as the sea. I mean it, as SALTY AS THE SEA. And always salt your water when it is at a rolling boil, rather than right when you put it on the stove (your pots will thank you for this). DO NOT PUT OLIVE OIL IN YOUR PASTA WATER! THIS IS A MYTH! It will make your pasta slippery and prevent the sauce from clinging to the strands properly.
There is little salt in this dough recipe, because it assumes you’ll be properly salting your pasta water as well as your filling and sauce. Always remember to taste as you cook!
Save your pasta water! This stuff is liquid gold, because it contains all the starches from your pasta and you can use it to build your sauce and make it really creamy and luxurious. Make sure to heat your sauce of choice in a separate pan and add a few spoonfuls of pasta water.
Drop your pasta into the pot and cook for only 2-3 minutes, depending on how al dente you like it. Using a slotted spoon or a spider, transfer your cooked pasta directly from the pot into the pan with the warmed sauce and toss until all the pasta is coated with the sauce. This is a much better alternative to just putting a pile of dry cooked pasta into a bowl and topping it with a sauce hat. Trust me.
Divide up your pasta and finish with a generous sprinkle of freshly grated (and I mean FRESHLY GRATED) Parmigiano Reggiano and a drizzle of good olive oil. Mangia!